Sequence Photography
It's very difficult to show movement or series of movements in one shot. After all, digital photography is built around one motionless picture. Sure, you can show one shot after the next to show movement, but who wants to look at photo after photo with just small changes of movement from one shot to the next?
How about merging them all into one shot? This is Sequence Photography. It's really cool to look at but pretty challenging to make.
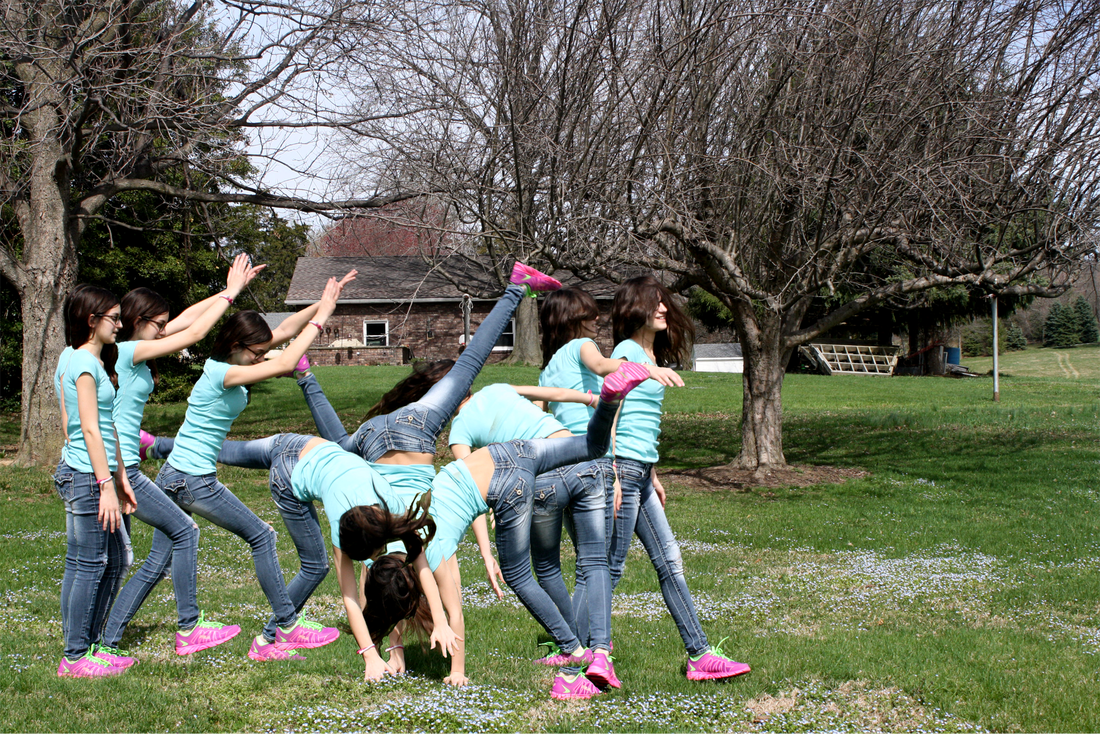
To start, take a series of shots with movement in them. It works best if the movement covers a distance. Something like someone playing basketball, driving the lane and hitting a layup would work. As the player dribbles and moves closer to the net they are moving across the court and covering a bit of ground. On the other hand, a baseball player swinging a bat would not be moving from point to point. There is movement, but it's all in the same general area. This would work, but it is more of a challenge to build than the basketball player driving the lane.
You will need to take a minimum of 7 shots for this project. You can do more, but take at least 7 pictures. As always, it's not a bad idea to have a second set of shots, maybe a different subject with a different action set, just in case the first set of pictures doesn't work out as you had planned.
Once they are shot and imported to the computer, this handout will walk you through building the sequence photo. Take your time and make sure that any erasing that is done is on the black and white layer mask, not the actual photo! This is one of the toughest projects that we do so take your time and be patient!
The video below will also walk you through the basic process if the handout doesn't clarify things enough for you.
